Skip to main content
Tanks for the Memories
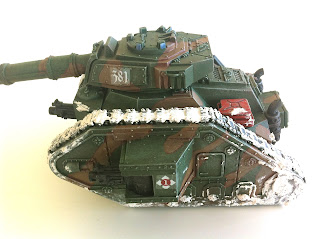
 More pictures today, I think. After a look at the artillery pieces a few days ago, now I'm going to have a look at a few of the tanks I've got on the go. The colour scheme is a simple Catachan Green / Graveyard Earth combo, but I've also been experimenting with a few different types of weathering and mud. First up: Imperial Guard Vanquisher. As I say, there's nothing too fancy about the paint job. Some good hints and tips are available in some of the Imperial Armour books, as well as looking at some old Golden Daemons. Looking at historical photos of tanks is a good start and there are lots of specialist modelling sites out there for historical and 1:35 gamers, with some really great tips. The mud is done with household filler, applied very roughly after painting then washed with successive layers of brown. The ones you see here have all been painted, then the unpainted filler added on top. You can see the haphazard way the 'mud' goes on to the painted tank gives quite a realistic effect even at this unfinished stage, my eye is always drawn to the mud on the red fuel cans on the back.
 Next up, this is a rear view of the same tank, along with the edge of my finger. This shows rather nicely two different mud effects you can get. The left track shows what it looks like if you wipe off all the excess mud. This 'flattens' all the texture in a realistic way, as the mud is pressed into all the gaps by the weight of the tank. On the right, this is what it might look like after going through particularly soft mud that sticks to the tracks. All I'll say is, if you're experimenting remember the old rule that you can always put more on later, but it's very difficult to take off if you put too much on.
Another shot of the same tank next, you can see some of the stowage. The stuff that comes on the tank accessories sprue is a great starting point but if you have lots of tanks, there's the risk that it all looks a bit samey, and everyone's got the same fuel cans and ammo crates on the back. Mixing it up with some scratch built items (like the rolled up tissue paper / PVA glue combo) and bits from other kits (the slightly different black fuel can next to the right track) can add a bit of variety and realism.
 Now, for the Demolisher ... my army has two of these beasts, and their (predictable) job is to roll up with the infantry and provide some close-in support to the battle for objectives. The first thing I should say is that this one has had Zimmerit anti-magnetic paint applied to the sides. This is just a flat layer of filler onto the unpainted tank, with a few horizontal lines (about 3-4mm apart) and lots of regular vertical lines (1mm apart). The purpose of this paint is to repel magnetic charges, and so there's a Houe Rule that it gives a 4+ save against attacks from melt bombs, krak grenades etc.
 The rear of the tank shows a few attempts at freehand painting. The red crosses on the fuel cans (used to indicate that these water cans in fact have fuel in) give a sort of improvised look, the feel of an Imperial Guard army on campaign. The numbers and letters are very basic but this is not one of my fortes. The good thing about free hand painting is that it is always unique, as opposed to transfers. The way to do this if you've never tried it is start simple. First, I did the red crosses, then the safety writing on the engine cover (small white writing just below the two cans on the turret - it's just white lines and dots), then the safety symbol (yellow-on-black triangle just below), then finally the '14 Coy' on the fuel drum. This way you can work up to however far you feel confident.

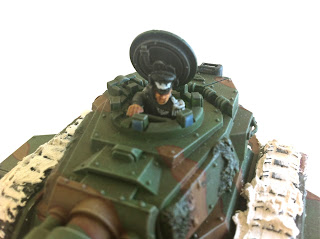
Next up, a close up of the turret with the commander in black tank uniform. One thing I don't like about Imperial Guard tanks is the strange compulsion the modelled tank commanders seem to have about going into battle with half their body poking out the top of a perfectly safe tank, waving a sword around. If I was a tank commander I'd be a lot more careful - hence the rather cowardly commander just poking his head out the top. It's just a cut-in-half Mordian with a spare arm from the Cadian Heavy Weapon set.
Finally this is a bit of a clearer shot of the Zimmerit anti-magnetic paint, as well as some of the pre-painted mud.
Well, that's enough for today; stay tuned for some more shots of the regular rank-and-file Guardsmen tomorrow, and hopefully a step-by-step for them.


Comments
Post a Comment